
What is the ESU dashboard gadget?
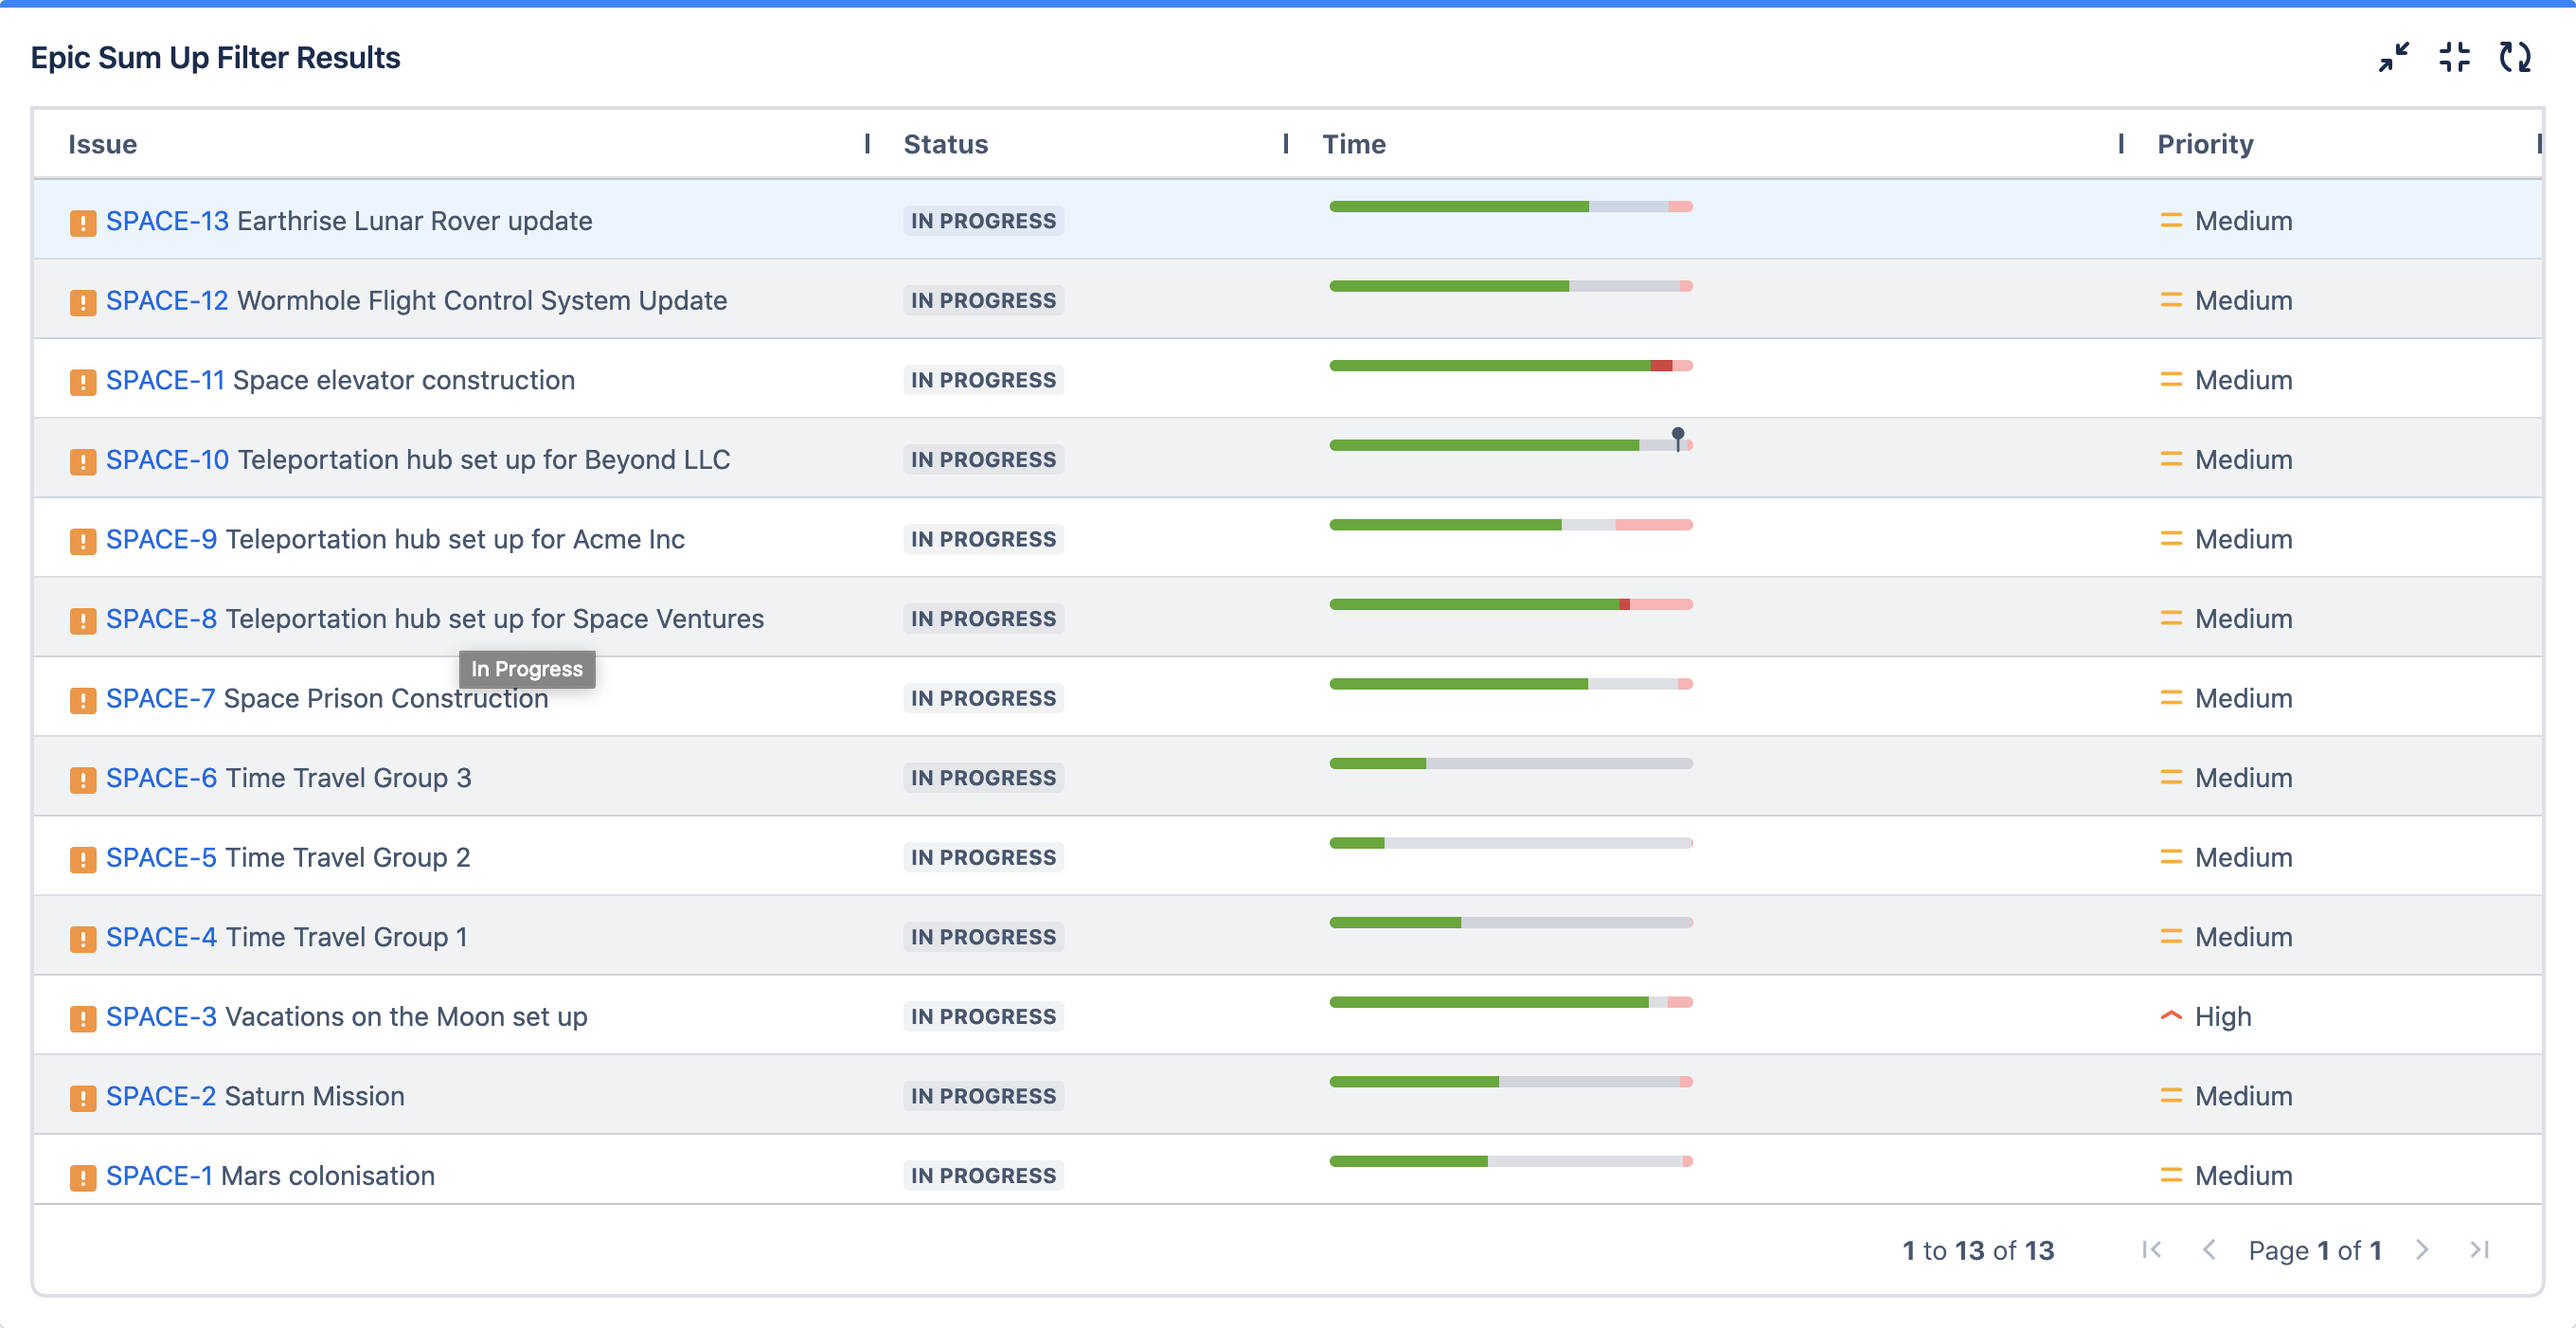
We built our dashboard gadget to offer more functionality, using ESU features, than the default Jira dashboard offers. Essentially the ESU dashboard gadget allows you to use our progress bars for easy project tracking.
What can you use it for?
The ESU dashboard gadget allows you to add progress bars and track work items across multiple epics, initiatives or parent work item types, with customizable metrics like time, story points or personnel costs.
You can use the ESU dashboard gadget to conveniently inline edit fields.
How to configure the Dashboard Gadget?
1.Create a filter (Optional if you want to use JQL)
Within the Jira Work item Navigator, use basic filters or JQL to create the scope for your dashboard gadget. Once you save the filter, you can navigate to your dashboard.
2.Add the gadget to your dashboard
In the upper right-hand corner, click on the Edit button. Once you click Edit, you will see a search bar under Add a gadget, here you will need to type in ESU.
When you see ESU Filter Results, click the Add button underneath – this will add ESU Filter Results Grid Gadget to your project dashboard.
3.Configure the dashboard gadget
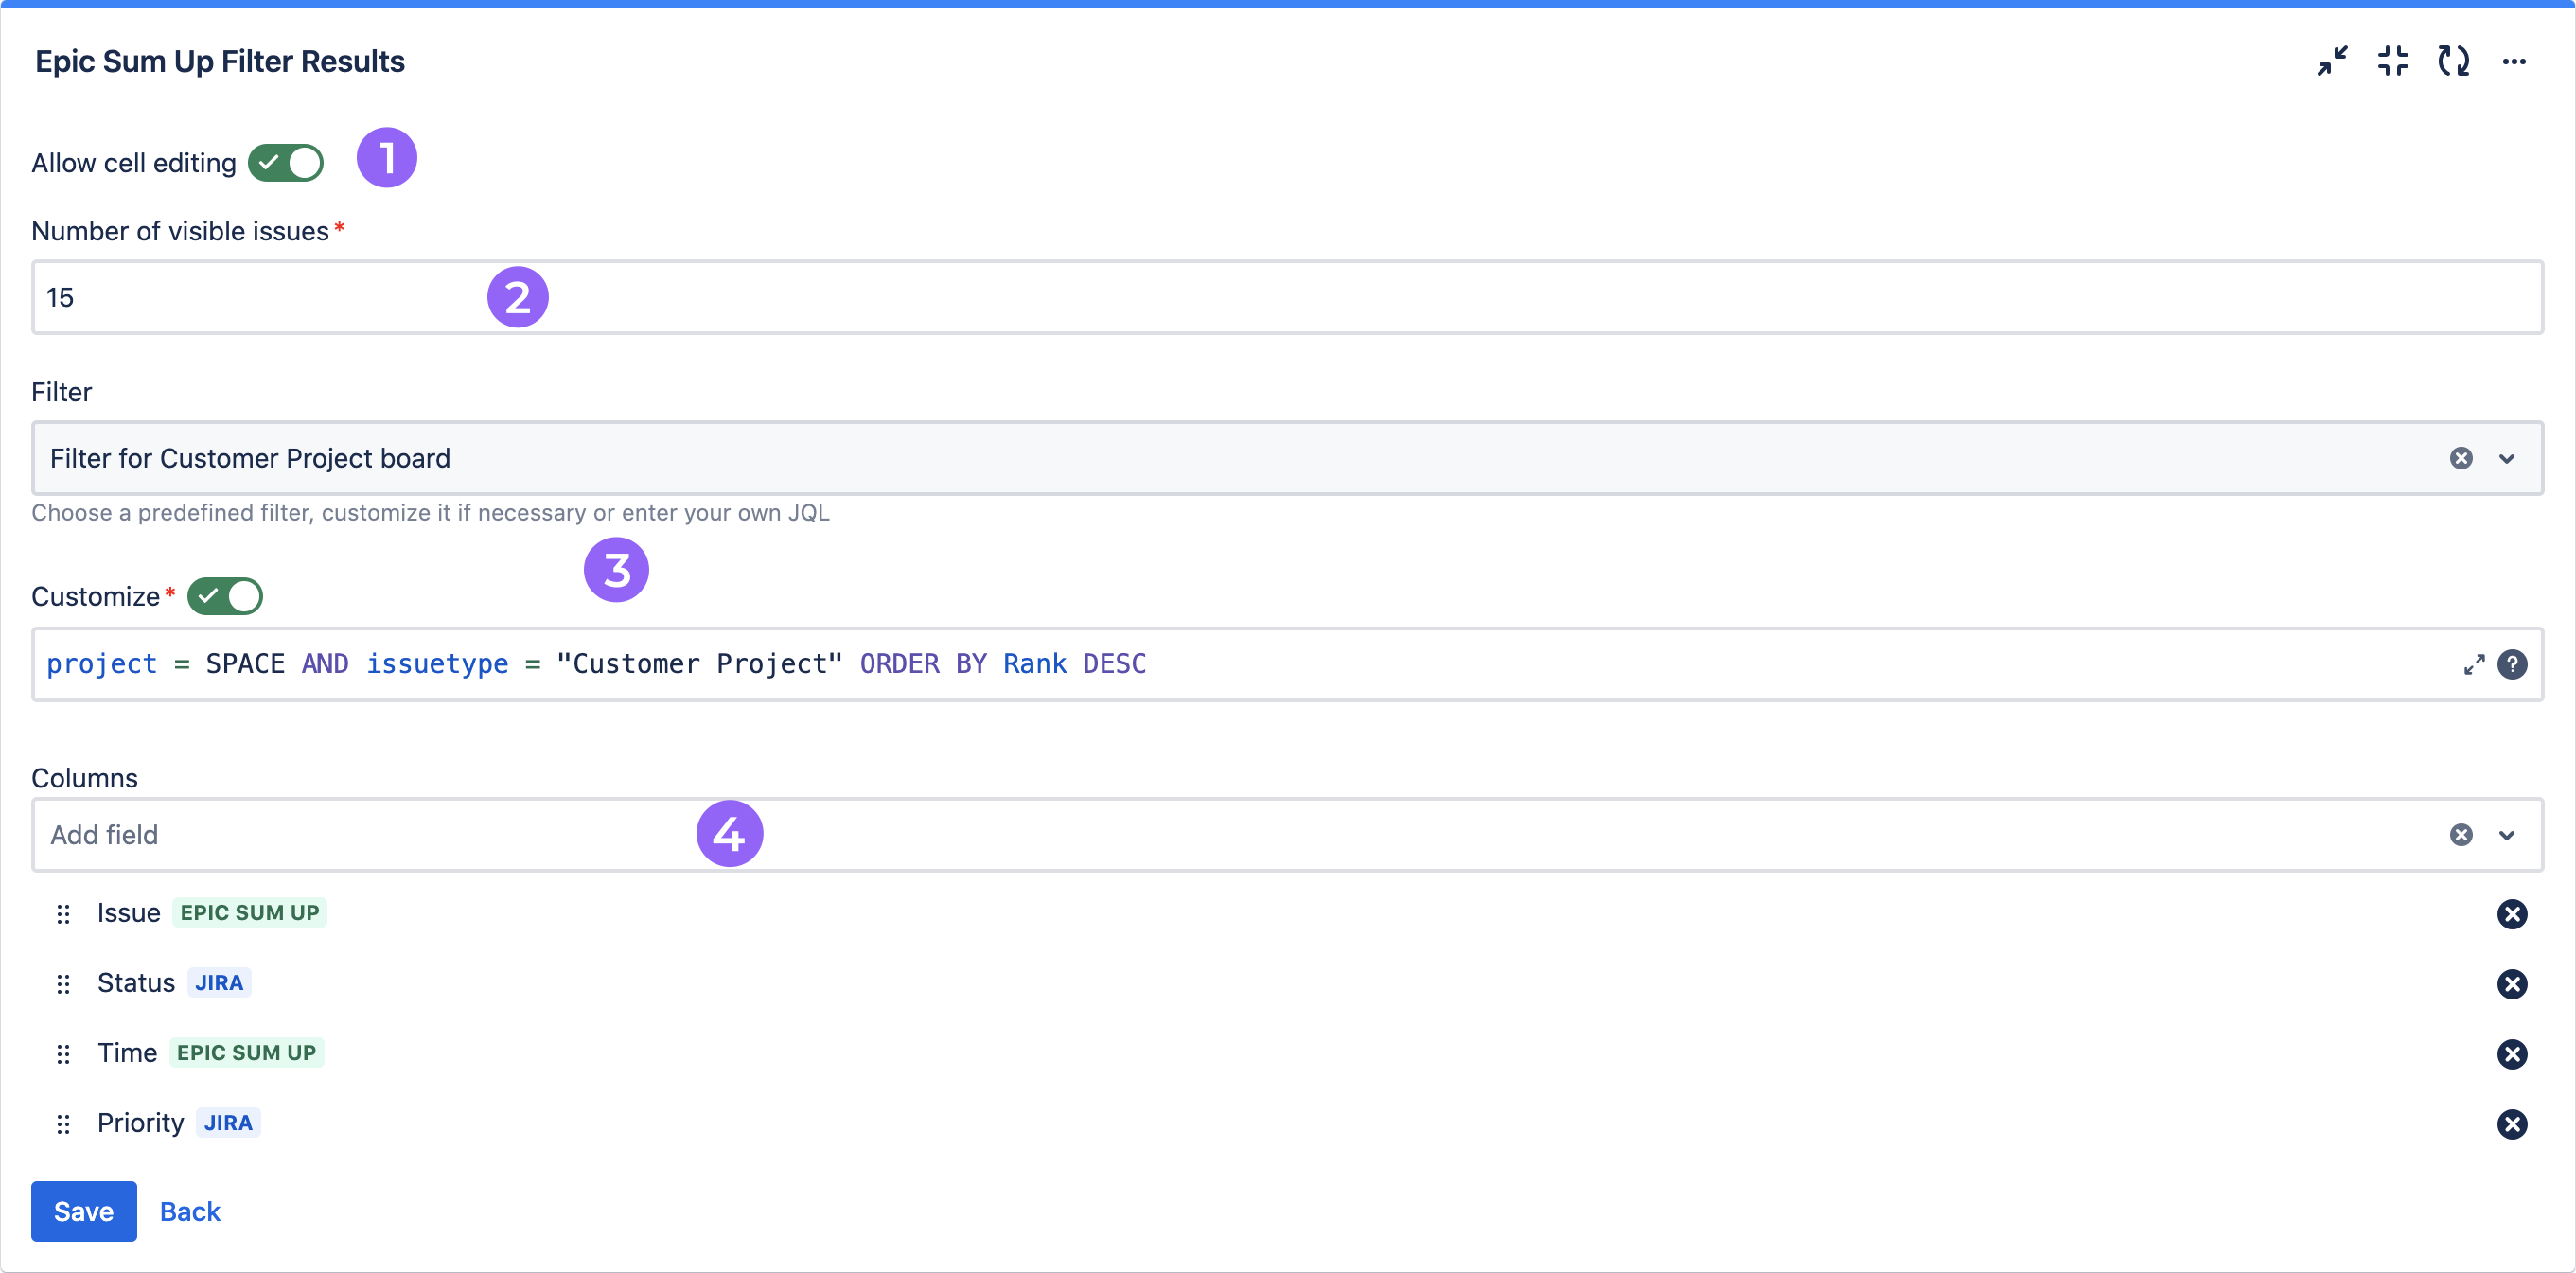
Within the ESU Filter Results Grid Gadget, you will see a toggle button for Allow Cell Editing - turn this option on to enable inline editing (1).
You can define the number of visible work items within your gadget (2). The number can be anywhere between 15 and 50. For filters with a larger number of work items, additional pages will be automatically created.
The drop down menu ‘Filter’ is where you select the filter you created in the first step (3).
Or you can use the JQL editor underneath to define a custom JQL filter for the gadget. You can also edit your filter directly from here.
The last step is to define the columns you want to see (4). You can select from system and custom Jira fields and all ESU progress bars.
Progress bars need to be configured specifically for each gadget.
4.Save
To save any changes, click the ‘Save’ button in the bottom left corner of the dashboard gadget.